
compustar install manual
Compustar Remote Start Systems offer advanced convenience, security, and comfort for vehicle owners. Designed to integrate seamlessly with various vehicles, these systems provide reliable performance and enhanced functionality, ensuring a superior driving experience.
1.1 What is Compustar?

Compustar is a leading brand specializing in remote start and security systems for vehicles. As part of Firstech, LLC, Compustar offers a wide range of products designed to enhance convenience, security, and comfort for car owners. Their systems are known for advanced features like remote start, keyless entry, and integration with factory systems. Compustar’s product line includes models such as the CMX series, which are popular for their reliability and ease of use. The brand also provides smartphone app control through DroneMobile, allowing users to manage their vehicle remotely. With a focus on innovation and quality, Compustar has become a trusted name in the automotive aftermarket industry, offering solutions for various vehicle types and user needs.
1.2 Benefits of Using Compustar
Compustar remote start systems offer numerous benefits, enhancing both convenience and security for vehicle owners. With Compustar, users can start their car remotely, ensuring the vehicle is warm in winter or cool in summer. The systems integrate seamlessly with factory features, maintaining the vehicle’s original functionality while adding advanced capabilities. Compustar also provides smartphone app control through DroneMobile, allowing users to manage their car from anywhere. These systems are known for their reliability, ease of use, and compatibility with a wide range of vehicles. Additionally, Compustar products come with warranties, ensuring peace of mind for customers. Overall, Compustar delivers a blend of innovation, convenience, and security, making it a top choice for vehicle owners seeking to upgrade their driving experience.
Pre-Installation Requirements
Ensure vehicle compatibility, gather necessary tools, and review the installation manual thoroughly before starting. Proper preparation ensures a smooth and successful Compustar system setup.
2.1 Vehicle Compatibility Check
Before installation, verify your vehicle’s compatibility with the Compustar system using the official compatibility guide on www.compustar.com or in the provided manual. Ensure your vehicle’s make, model, and year are supported to avoid installation issues. Certain models, such as the CMX series, are designed for specific vehicles, so accurate matching is crucial. This step ensures proper functionality and prevents potential system malfunctions. Always cross-reference your vehicle’s specifications with the Compustar system requirements for a seamless setup. If unsure, consult a professional installer or contact Compustar support for assistance.
2.2 Tools and Materials Needed
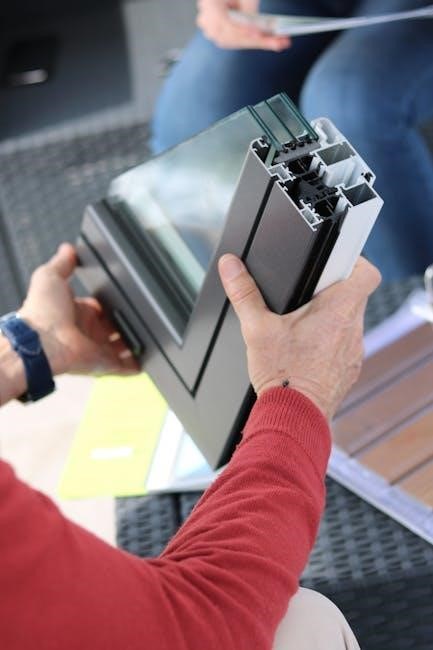
To install a Compustar Remote Start System, gather the necessary tools and materials. You will need a screwdriver set, wire cutters, a multimeter, and electrical tape for wiring connections. Additionally, ensure you have the correct wiring harness and T-harness for your vehicle’s make and model. The installation manual provides a detailed list of required tools and materials specific to your system. For advanced setups, optional accessories like sensors or auxiliary components may be needed. Always refer to the manual or manufacturer’s website for precise requirements, as tools may vary depending on your vehicle and system model. Proper preparation ensures a smooth and successful installation process.

Installation Basics

Installation Basics involve understanding the control module, connecting the battery and ground wire, and following the manual’s step-by-step guide for a successful setup.
3.1 Understanding the Control Module
The control module is the core of the Compustar Remote Start System, acting as the brain that processes remote signals, sensor inputs, and system configurations. It is responsible for interpreting commands from the remote control and executing functions like engine start, door locking, and alarm triggering. Key features include compatibility with various remote transmitters, auxiliary output channels for custom accessories, and advanced security protocols. Proper installation requires mounting the module in a secure, dry location, away from direct sunlight and heat sources. Connecting the module involves linking it to the vehicle’s electrical system, sensors, and accessories. Always refer to the specific model’s manual for detailed wiring diagrams and configuration settings to ensure optimal performance and functionality.
3.2 Connecting the Battery and Ground Wire
Connecting the battery and ground wire is a critical step in the installation process. The battery wire must be linked to the positive terminal of the vehicle’s battery, ensuring a stable power supply for the Compustar system. The ground wire should be securely attached to a clean, bare metal surface on the chassis or engine block to provide a reliable ground connection. Proper insulation and routing of these wires are essential to prevent interference or damage. Use the appropriate tools, such as wire strippers and crimpers, to ensure secure connections. Always refer to the vehicle’s wiring diagram and the Compustar manual for specific recommendations. A faulty ground or power connection can lead to system malfunctions, so double-check all connections before proceeding with the installation.

Wiring and Connections
Wiring and connections involve securing the harness, connecting sensors, and ensuring proper insulation. Use appropriate tools and diagrams to prevent interference and ensure reliable system performance.
4.1 Wiring Harness Overview
The wiring harness is a pre-configured set of cables designed to simplify the installation process. It includes color-coded wires for power, ground, ignition, and accessory connections. Each wire is labeled to ensure proper placement, reducing the risk of errors. The harness is tailored to the Compustar system, ensuring compatibility and ease of use. Properly connecting the wiring harness is critical for system functionality. Always refer to the provided diagrams and manufacturer guidelines to ensure accurate connections. This step is essential for avoiding electrical issues and ensuring reliable performance. The wiring harness is a key component that streamlines the installation process, making it accessible for both professionals and DIY enthusiasts.
4.2 Connecting Sensors and Accessories
Connecting sensors and accessories is a critical step in the installation process. Start by identifying the appropriate ports on the control module for each component. Door sensors, shock sensors, and LED indicators must be connected to their designated wires. Ensure all connections are secure to avoid signal interference. For optional accessories like trunk release or auxiliary lights, refer to the wiring diagram for proper integration. After connecting, test each sensor and accessory to confirm functionality. If issues arise, consult the troubleshooting section of the manual. Properly connected sensors and accessories ensure optimal system performance and enhance the overall user experience. Always follow the manufacturer’s guidelines for specific configurations.

System Configuration
System configuration involves setting up the control module, defining user preferences, and integrating accessories to ensure optimal performance and personalized functionality, following the manual’s guidelines.

5.1 Programming the Remote Control
Programming the remote control ensures proper communication between the remote and the control module. Start by turning the ignition to the “ON” position without starting the engine. Press and hold the “LOCK” button on the remote for 5 seconds until the LED on the control module flashes. Release the “LOCK” button and immediately press the “UNLOCK” button three times. The LED will flash twice, confirming synchronization. Repeat this process for additional remotes. Ensure the vehicle’s battery is connected during programming. If issues arise, refer to the manual for troubleshooting steps or reset procedures. Proper synchronization ensures reliable remote start functionality and security features. Always test the remote after programming to confirm functionality.

5.2 Setting Up Auxiliary Channels
Auxiliary channels allow customization of additional vehicle functions, such as trunk release or sliding door control. To set up auxiliary channels, access the system’s programming menu by pressing the remote’s “LOCK” and “UNLOCK” buttons simultaneously for 3 seconds. Use the remote to cycle through available channels, assigning each to a specific function. Confirm each setting by pressing the “START” button. Ensure all auxiliary functions are tested post-setup to verify proper operation. Refer to the manual for specific button sequences and channel assignments. Proper configuration ensures seamless integration of auxiliary features with your Compustar system, enhancing overall functionality and user experience. Always test each channel to confirm correct operation before finalizing the setup.
Testing and Troubleshooting
After installation, test the system to ensure all features function correctly. Check remote start, security, and auxiliary functions. Troubleshoot common issues like wiring or sensor malfunctions by consulting the manual or contacting support for assistance.
6.1 Initial System Testing
After completing the installation, perform a thorough test of the Compustar system to ensure all features function correctly. Start by testing the remote start functionality, verifying that the engine turns on and off as expected. Check the security features, such as the alarm and immobilizer, to confirm they activate and deactivate properly. Test the range of the remote controls and ensure all buttons respond accurately. Inspect the wiring connections to prevent any electrical issues. If any malfunctions occur, refer to the troubleshooting section of the manual or contact Compustar support for assistance. A systematic approach ensures reliability and optimal performance of your remote start system.
6.2 Common Issues and Solutions
Common issues during Compustar system installation include remote start failure, alarm malfunctions, or wiring problems. If the remote start doesn’t activate, check the battery connections and ensure the remote is programmed correctly. For alarm issues, verify that sensors are properly connected and configured. Wiring problems often stem from loose connections or incorrect harness links. Consult the manual for specific troubleshooting steps. If issues persist, reset the system or reprogram the remote. For complex problems, contact Compustar support or refer to the detailed troubleshooting guide in the manual. Regular system checks and proper installation practices can prevent many of these issues, ensuring reliable performance and functionality.
Advanced Features and Customization
Compustar systems offer advanced features like smartphone app control and factory system integration, allowing users to enhance functionality and customize their remote start experience.
7.1 Remote Start via Smartphone App
Compustar systems allow seamless remote start functionality through a dedicated smartphone app. Users can start their vehicle, check its status, and receive notifications directly on their device. The app ensures convenience and security, enabling remote monitoring and control. Compatible with both iOS and Android, it offers a user-friendly interface for enhanced vehicle management. This feature eliminates the need for physical remotes, providing a modern and accessible solution. Proper installation and configuration are essential for optimal performance. A stable internet connection is required for the app to function correctly, ensuring reliable communication between the smartphone and the vehicle’s system.
7.2 Integration with Factory Systems
Compustar systems are designed to integrate seamlessly with factory-installed vehicle features, ensuring compatibility and maintaining functionality. The CMX series, for example, works with various vehicle makes and models, preserving features like keyless entry and push-button start. This integration allows for a hassle-free installation process, ensuring that the remote start system complements the vehicle’s existing systems. Proper installation involves using T-harnesses and following the manufacturer’s guidelines to maintain factory warranties and ensure optimal performance. This feature-rich integration enhances the overall driving experience, providing convenience and reliability without compromising the vehicle’s original features.
Warranty and Support Information
Compustar systems offer a 1-year warranty for remotes and up to 3 years for select models. Warranty registration is available online at www.compustar.com. For detailed warranty information and support resources, visit the official website or refer to the provided manual.
8.1 Warranty Details and Coverage
Compustar products are backed by a comprehensive warranty program. Firstech remotes typically carry a 1-year warranty from the original purchase date, while select Compustar models, such as the Pro 2WT11R-SS, offer an extended 3-year warranty. Warranty coverage includes defects in materials and workmanship, ensuring reliable performance. Registration can be completed online at www.compustar.com, and detailed warranty terms are outlined in the product manual. This ensures customers receive support and protection for their investment, maintaining peace of mind with their Compustar system.
8.2 Contacting Compustar Support

For any inquiries or assistance, Compustar provides dedicated support channels. Customers can visit the official website at www.compustar.com for comprehensive resources, including troubleshooting guides, manuals, and warranty information. The website also offers detailed product specifications and installation instructions. Additionally, users can access support through the manual provided with their system, which includes step-by-step guidance and solutions to common issues. Compustar’s support team ensures that customers receive timely and effective assistance, helping them maximize their system’s performance and resolve any concerns efficiently.
Conclusion and Additional Resources
Compustar Remote Start Systems offer a blend of convenience, security, and innovation. For further guidance, visit www.compustar.com or refer to the provided installation manual for detailed instructions and support.
9.1 Summary of Key Points
Compustar Remote Start Systems provide a comprehensive solution for vehicle convenience and security. Key features include remote start, security alarms, and smartphone app integration. Installation requires compatibility checks, proper tools, and careful wiring. The control module is central to system functionality, ensuring reliable operation. Configuration involves programming remotes and setting up auxiliary channels. Testing is crucial to verify all components work seamlessly. Troubleshooting common issues ensures optimal performance. Advanced features like app control and factory system integration enhance user experience. Warranty details vary by product, with coverage ranging from 1 to 3 years. For additional support, refer to the official Compustar website or installation manual.
9.2 Where to Find More Information
For detailed guidance on Compustar Remote Start Systems, visit the official Compustar website at www.compustar.com. Here, you can access comprehensive installation manuals, user guides, and troubleshooting resources. Additionally, the Compustar support team is available to address technical inquiries. Video tutorials and installation guides are also available on platforms like YouTube and the Compustar blog. For specific models, such as the CM4200DX or 2WQ900AS, refer to their respective manuals or the Compustar master installation guide. Ensure to register your product on the Compustar website for warranty activation and updates. For further assistance, contact Compustar support directly or consult authorized dealers.